Set up Apple sign-in
Prerequisites
Before you start, make sure you have:
- A Serverpod project with the new auth module installed. New projects created with
serverpod create(Serverpod 3.4 and later) include it by default. If you are upgrading an older project, follow the auth module setup guide first. - An active subscription to the Apple Developer Program. Sign in with Apple requires this even for local development.
- Xcode installed if you target iOS or macOS.
Get your credentials
All platforms require an App ID and a Sign in with Apple key. Android and Web additionally require a Service ID.
Register your App ID
-
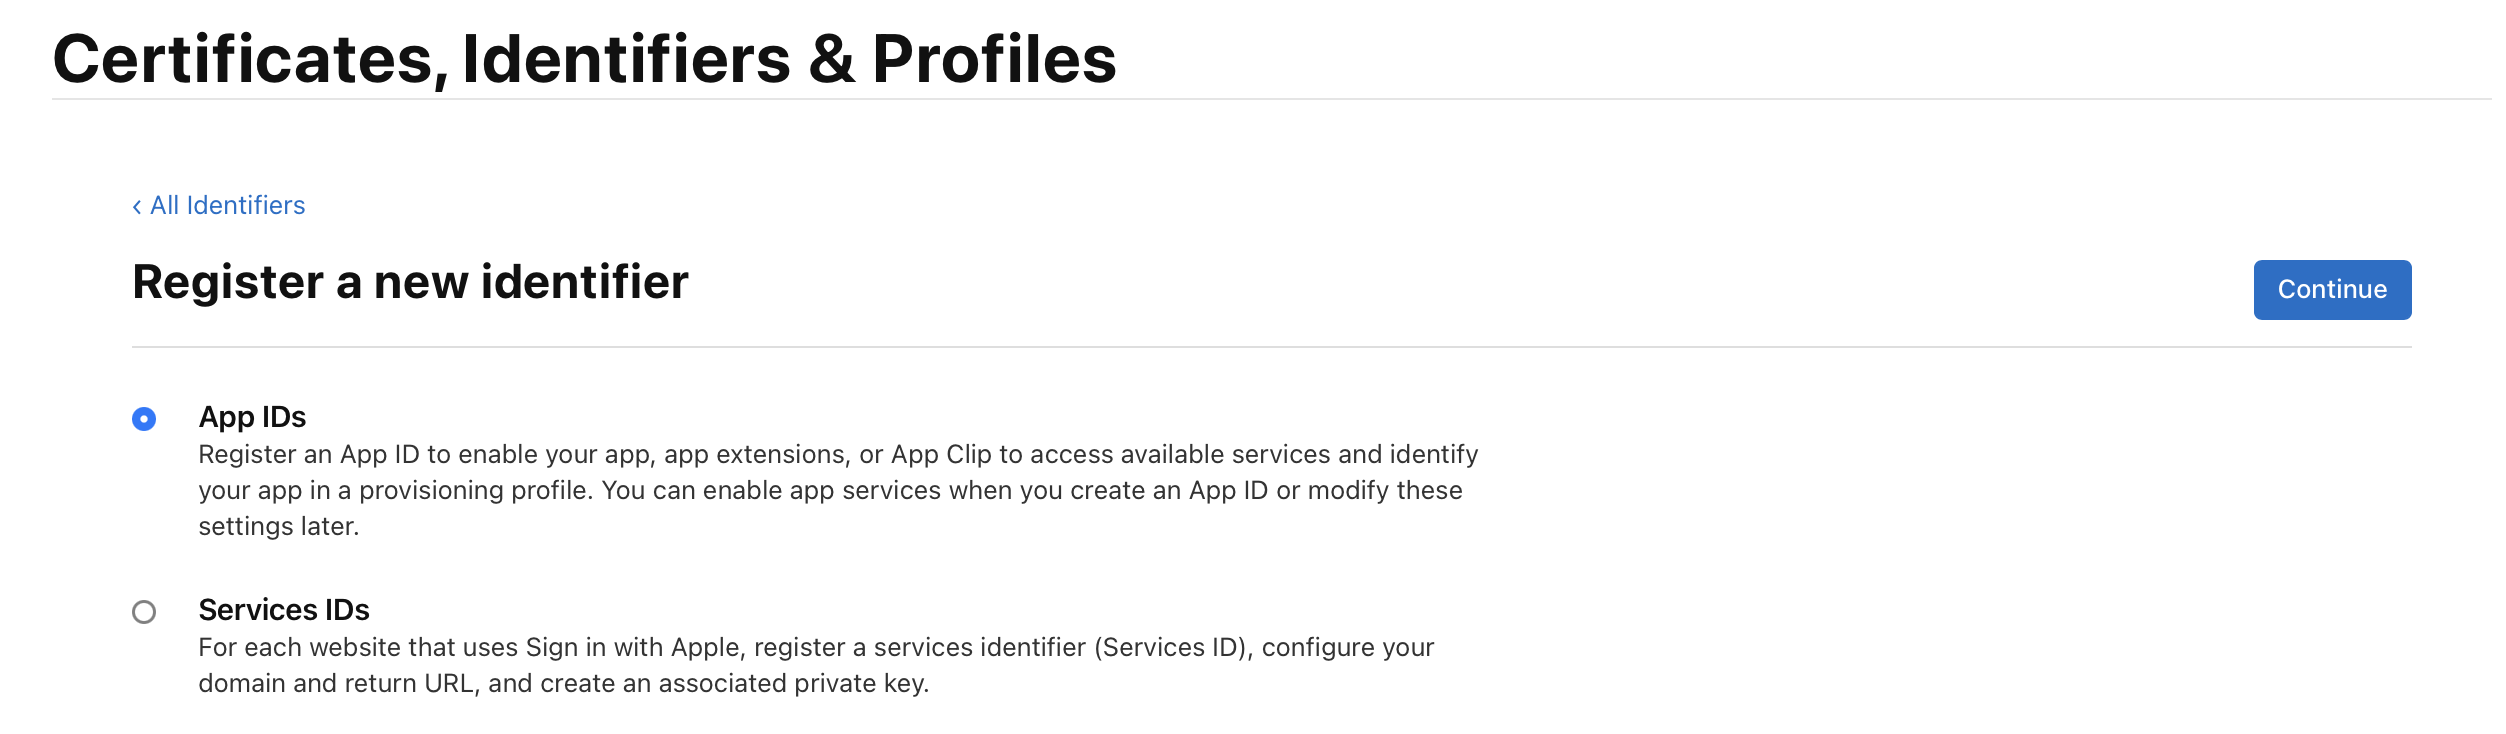
In Certificates, Identifiers & Profiles, click Identifiers → +.
-
Select App IDs and click Continue.
-
Select App as the type and click Continue.
-
Fill in a description and your app's Bundle ID (e.g.
com.example.app). -
Scroll down to Capabilities, find Sign in with Apple, and check it. Keep it set as a primary App ID.

-
Click Continue, then Register.
Create a Service ID (Android and Web only)
Skip this section if you are building for iOS or macOS only.
-
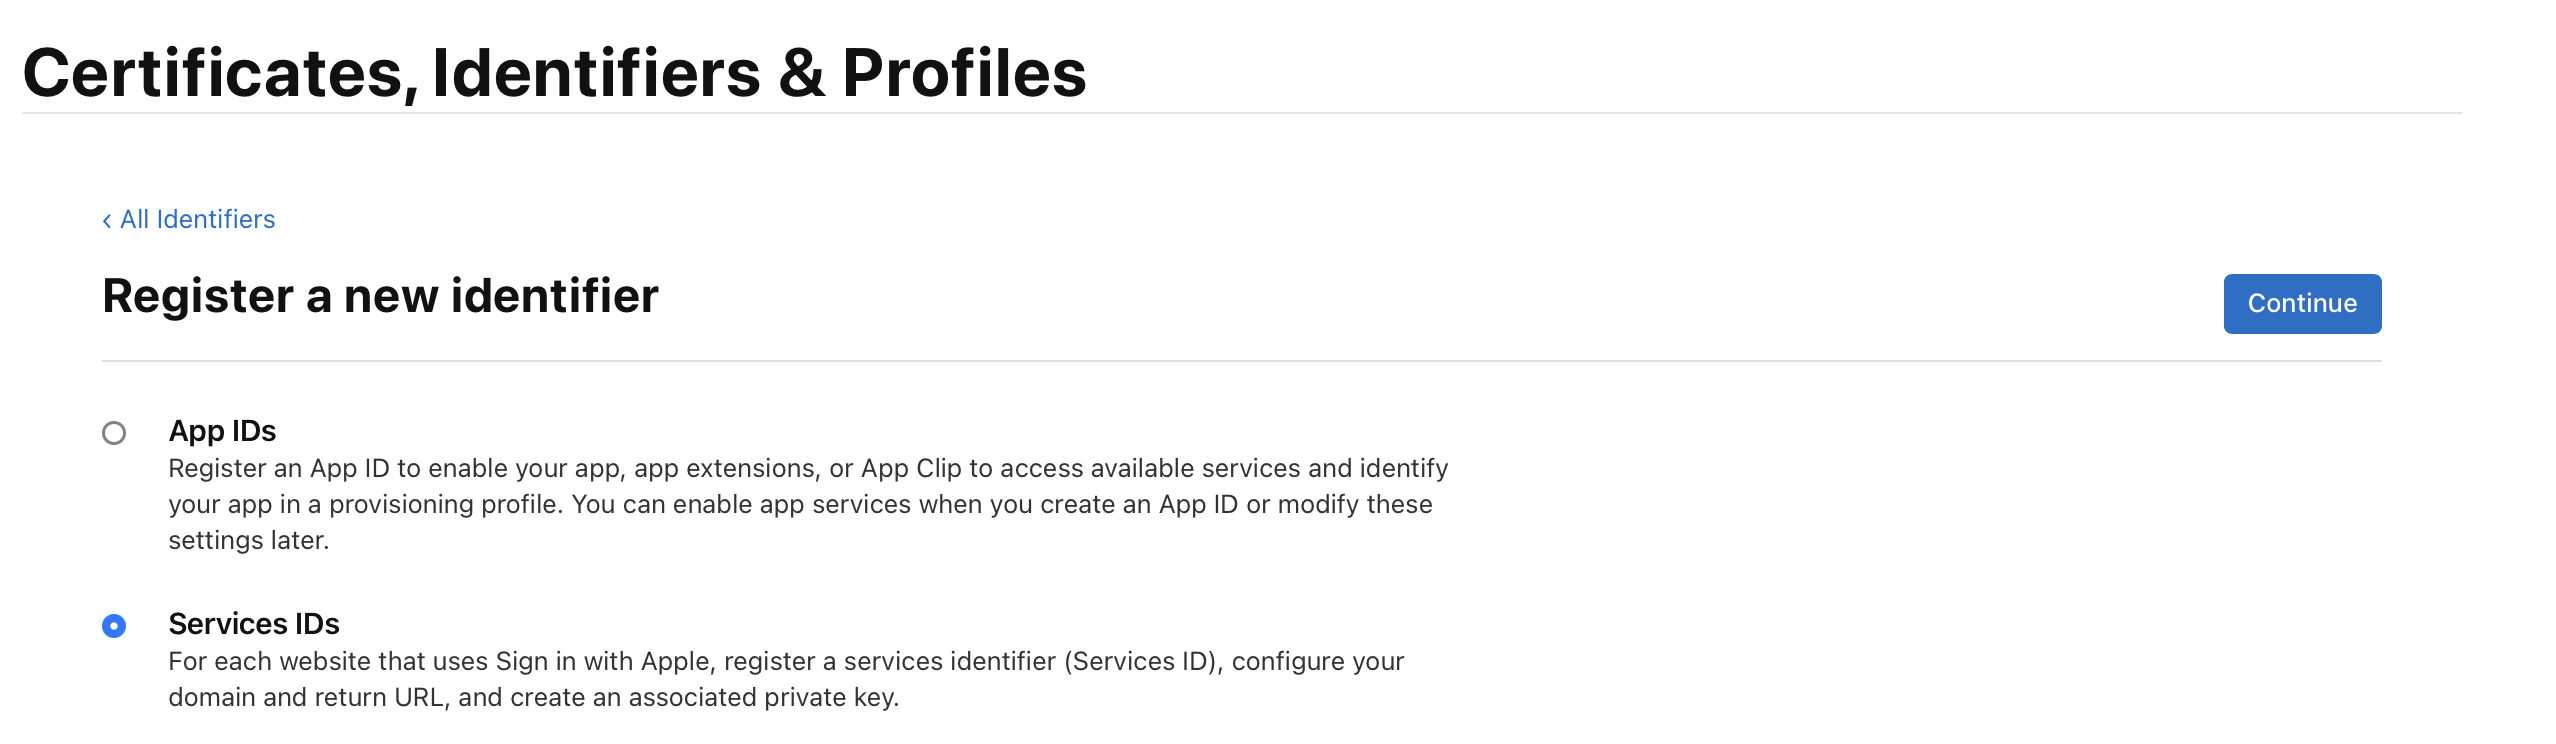
In Certificates, Identifiers & Profiles, click Identifiers → +.
-
Select Services IDs and click Continue.
-
Enter a description and a unique Identifier (e.g.
com.example.service). This value becomes yourserviceIdentifier. Click Continue, then Register. -
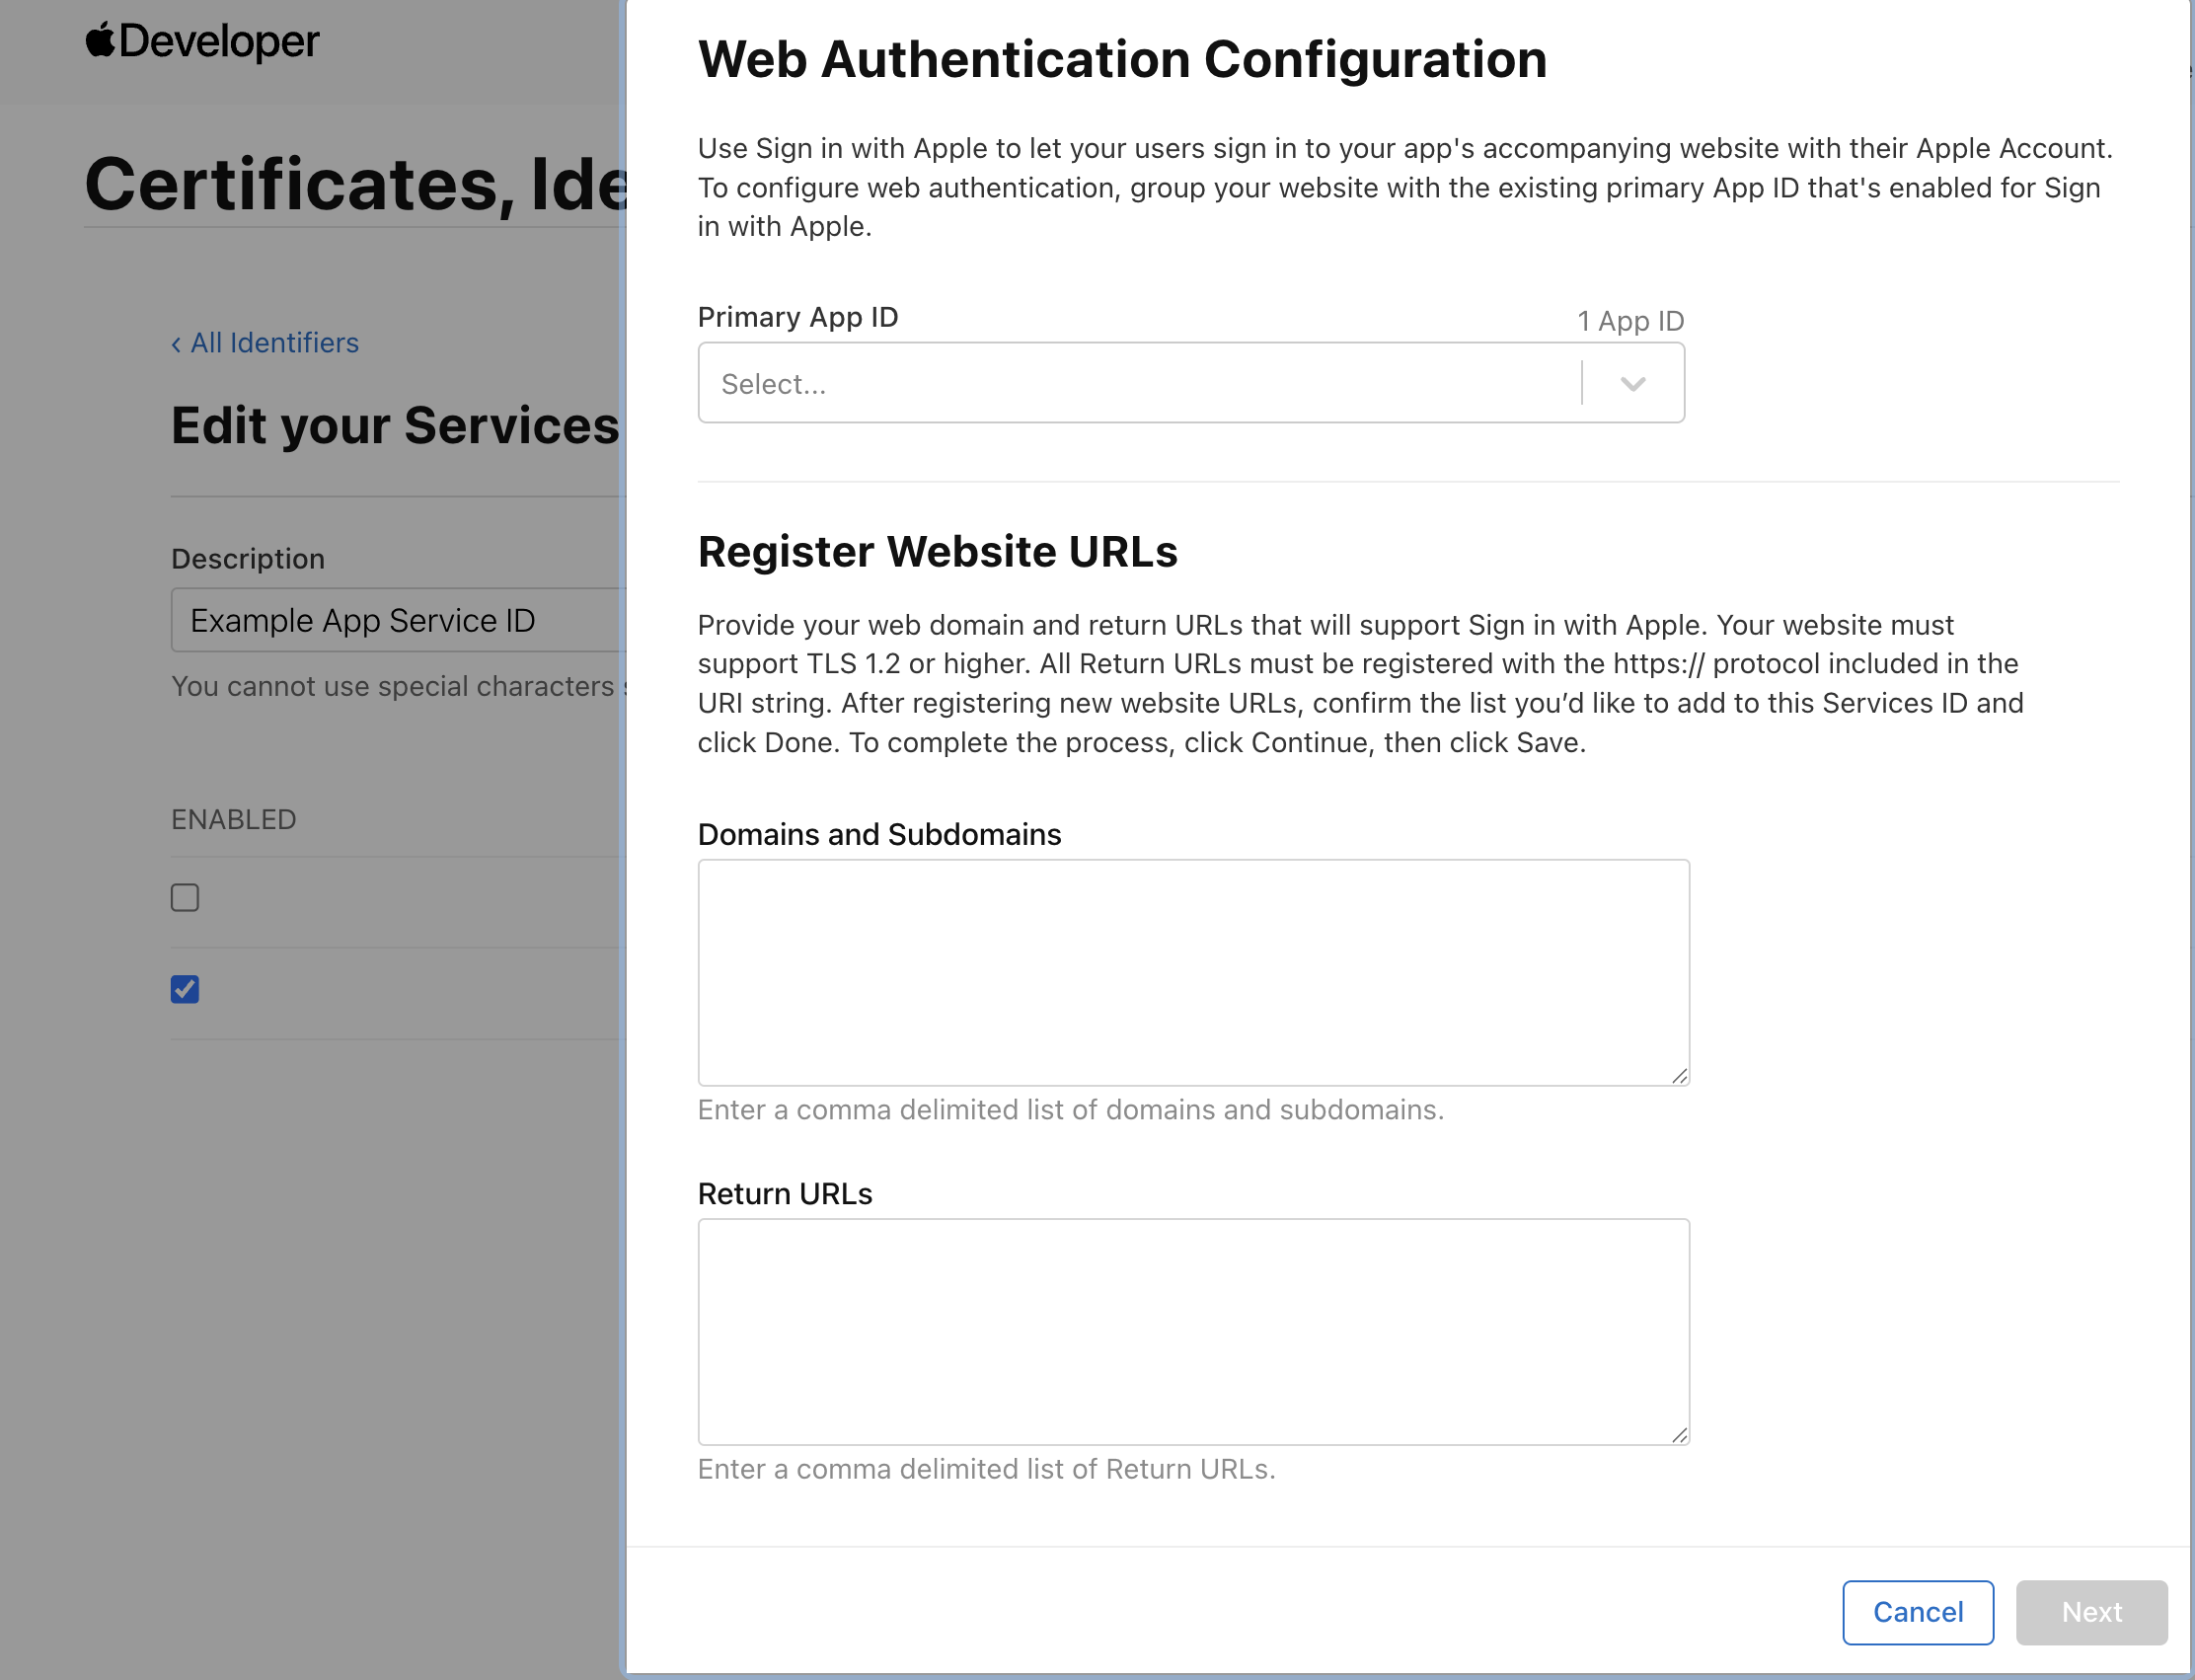
Click on the Service ID you just created. Check Sign in with Apple and click Configure.
-
In the modal, set:
- Primary App ID: the App ID from the previous section
- Domains and Subdomains: your domain (e.g.
example.com) - Return URLs: your server's callback route (e.g.
https://example.com/auth/callback)
-
Click Next, then Done, then Save.
All return URLs must use HTTPS. Apple rejects HTTP URLs, including localhost. For local development, expose your server over HTTPS using a tunnelling service, like ngrok or Cloudflare Tunnel.
If you plan to support web sign-in, also register the value you will use for appleWebRedirectUri (e.g. https://example.com/auth/apple-complete) under Return URLs. Without it, the web flow will fail when Apple validates the redirect.
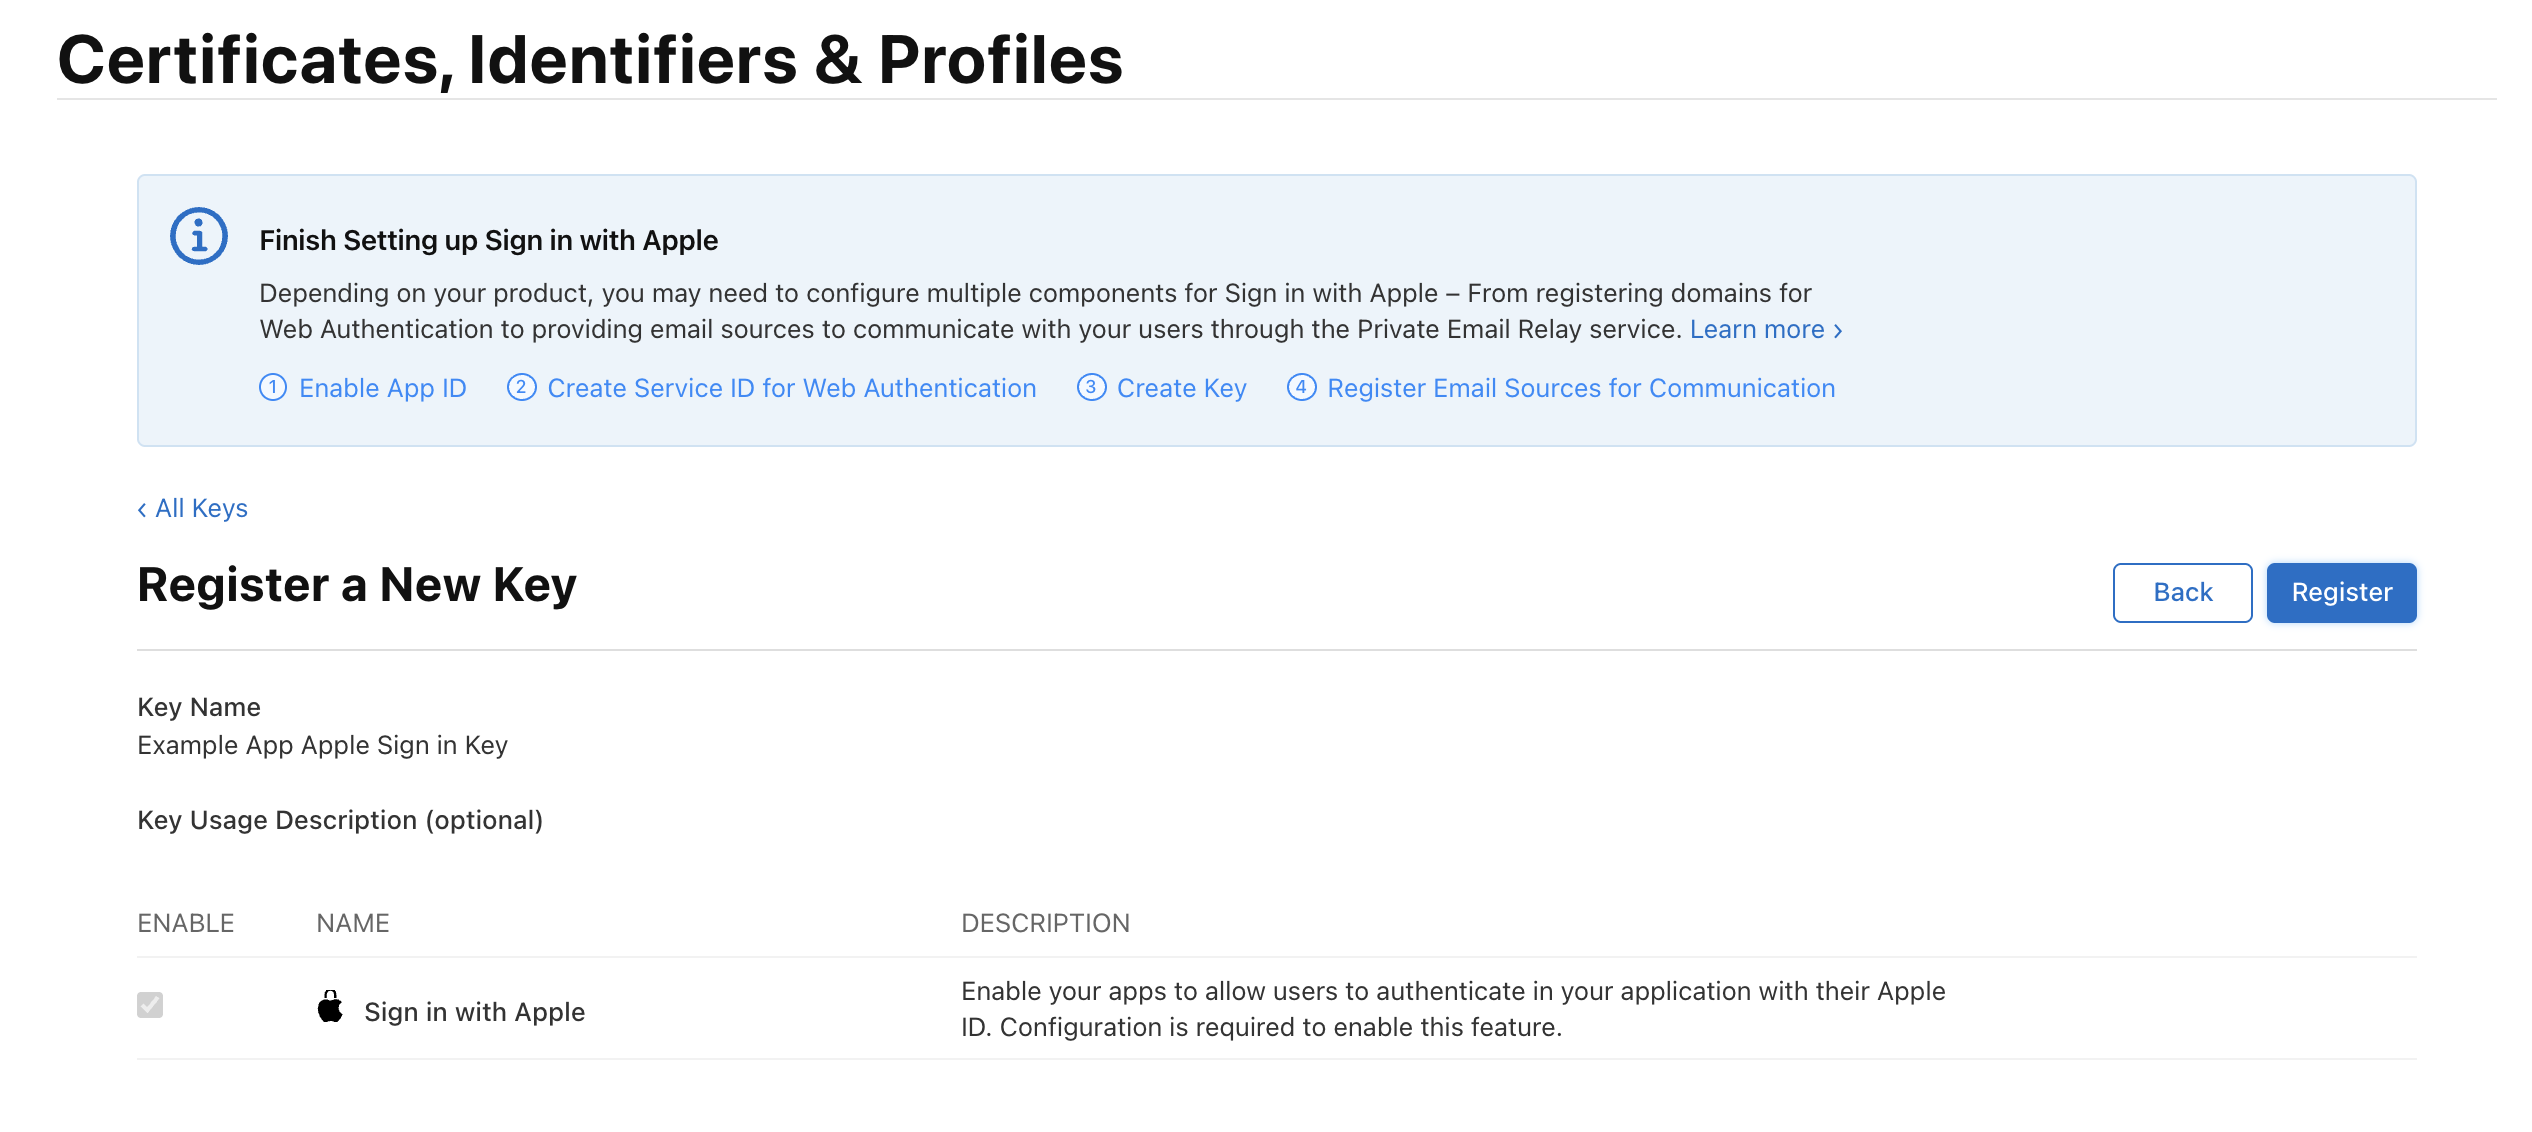
Create a Sign in with Apple key
-
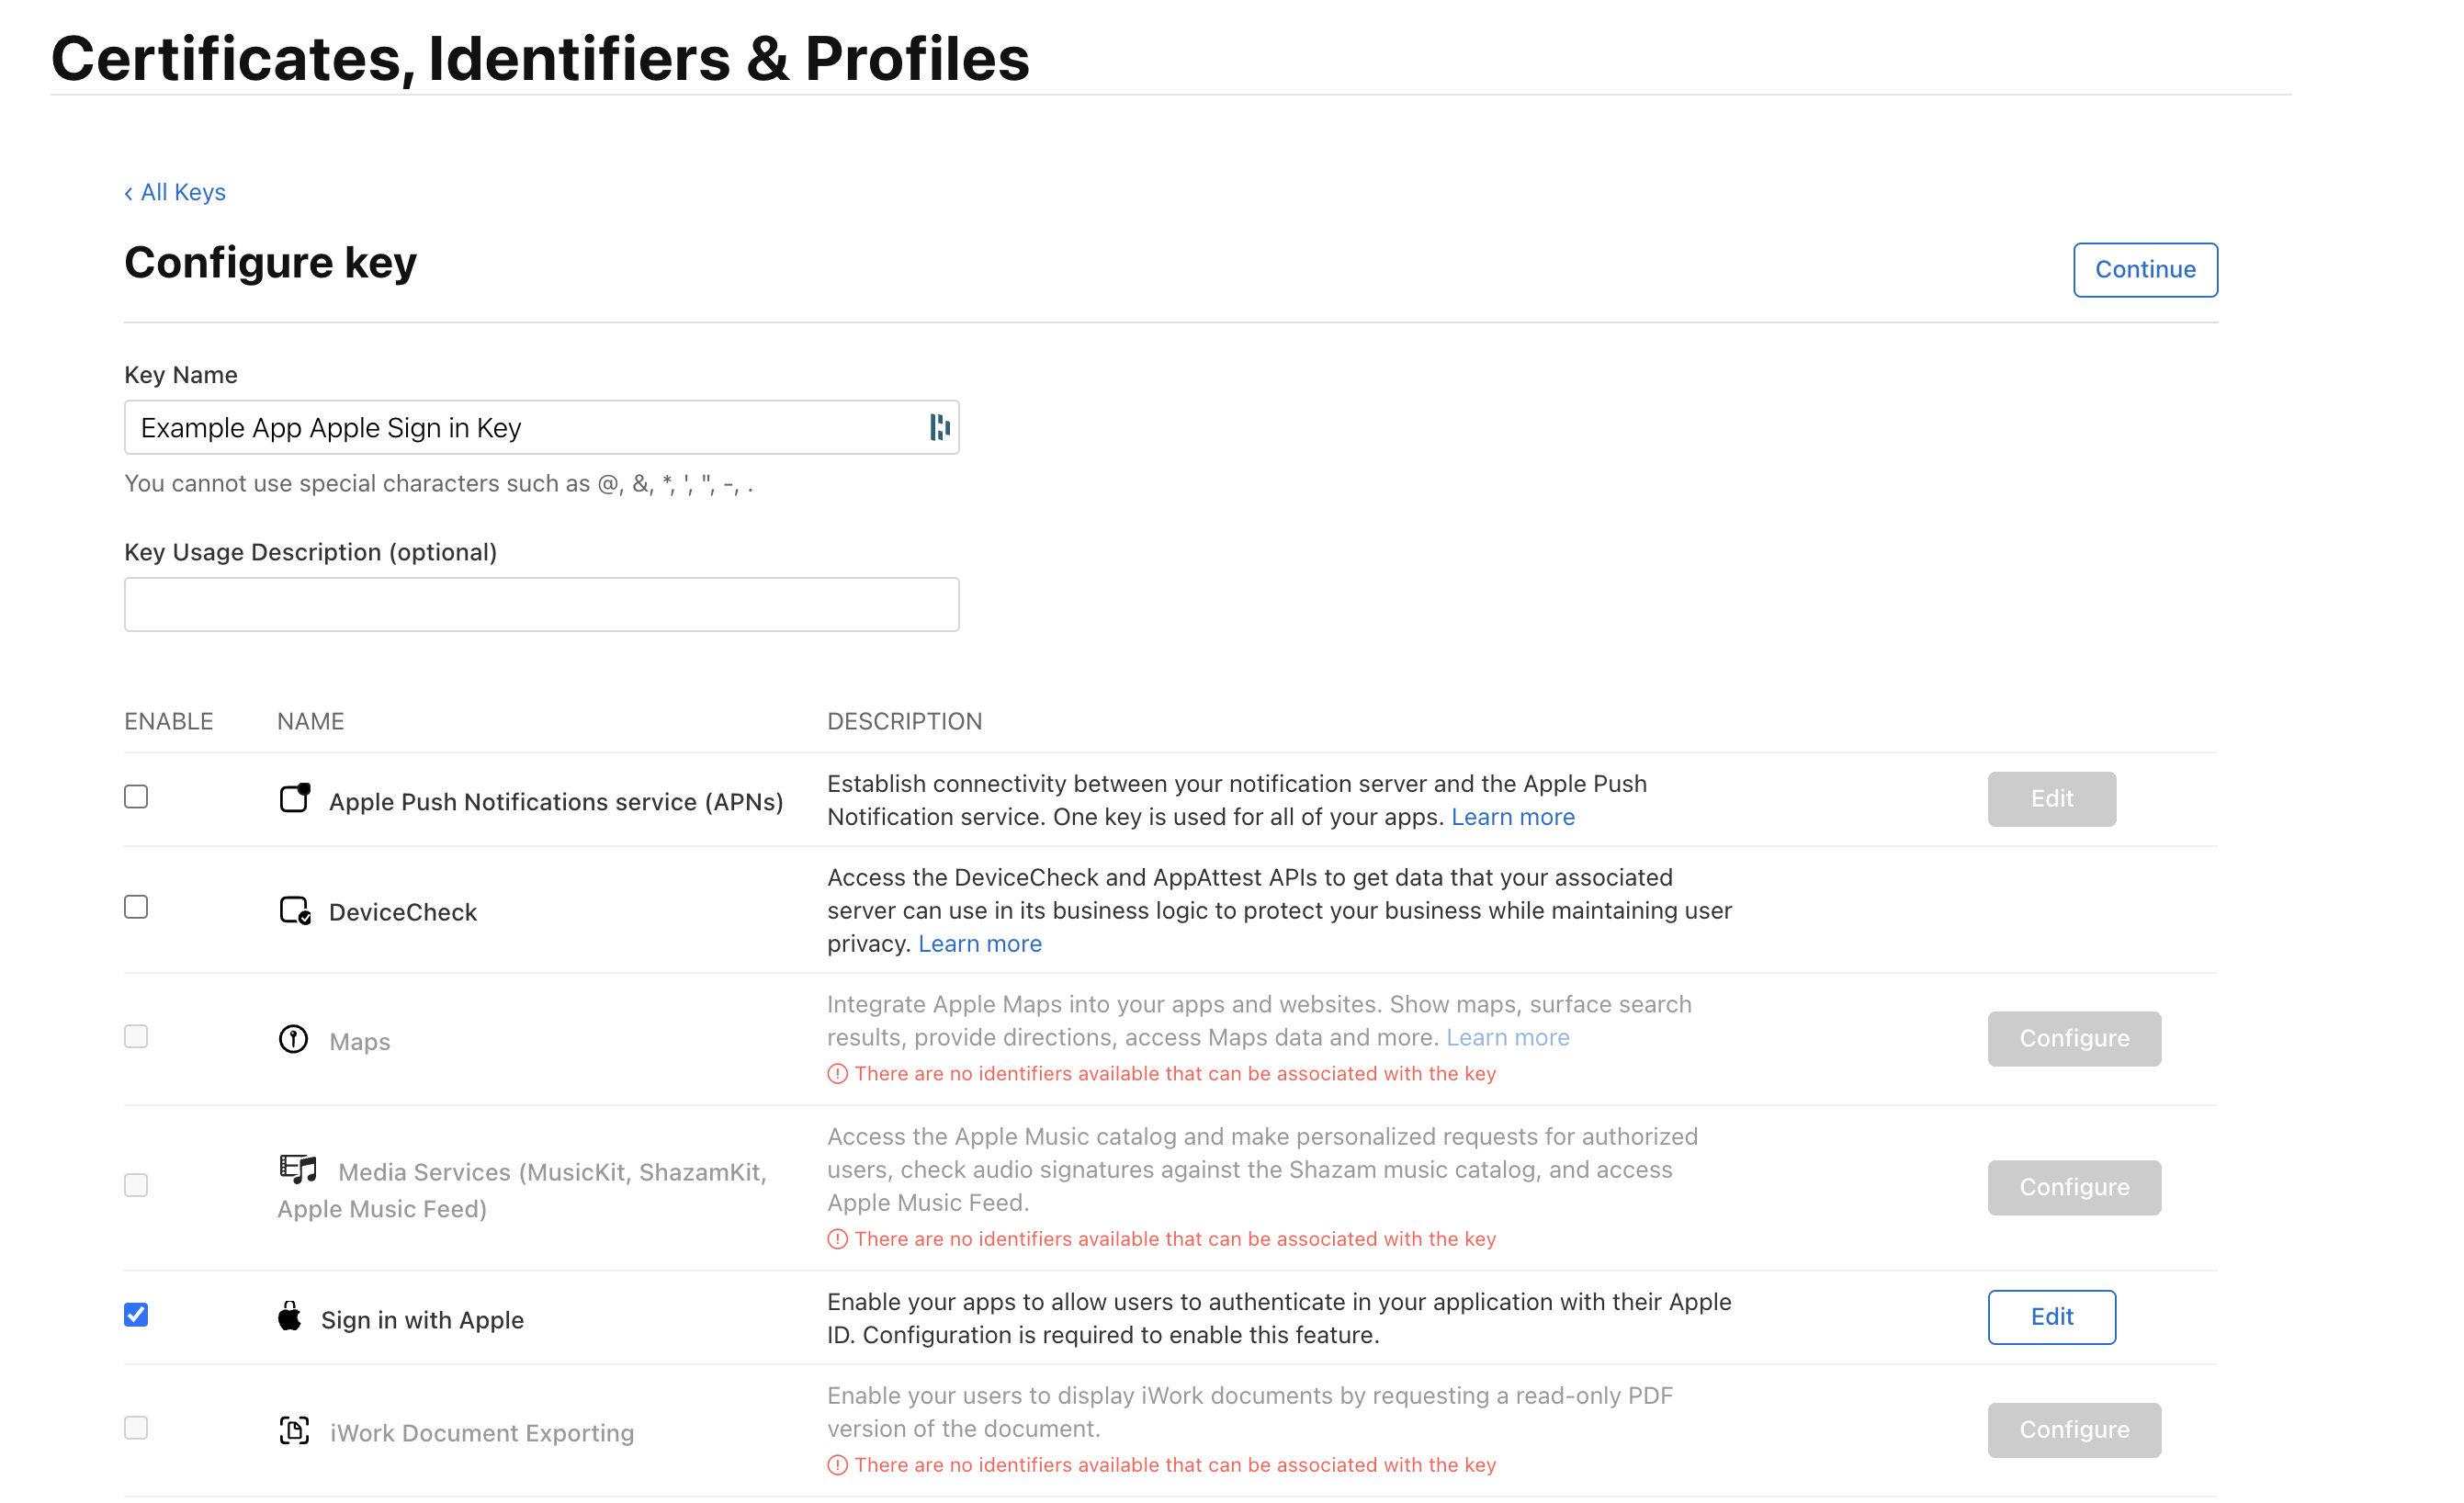
In Certificates, Identifiers & Profiles, click Keys → +.
-
Enter a key name, check Sign in with Apple, and click Configure. Select your primary App ID and click Save.
-
Click Continue, then Register.
-
Download the
.p8key file immediately: you can only download it once. Note the Key ID shown on this page.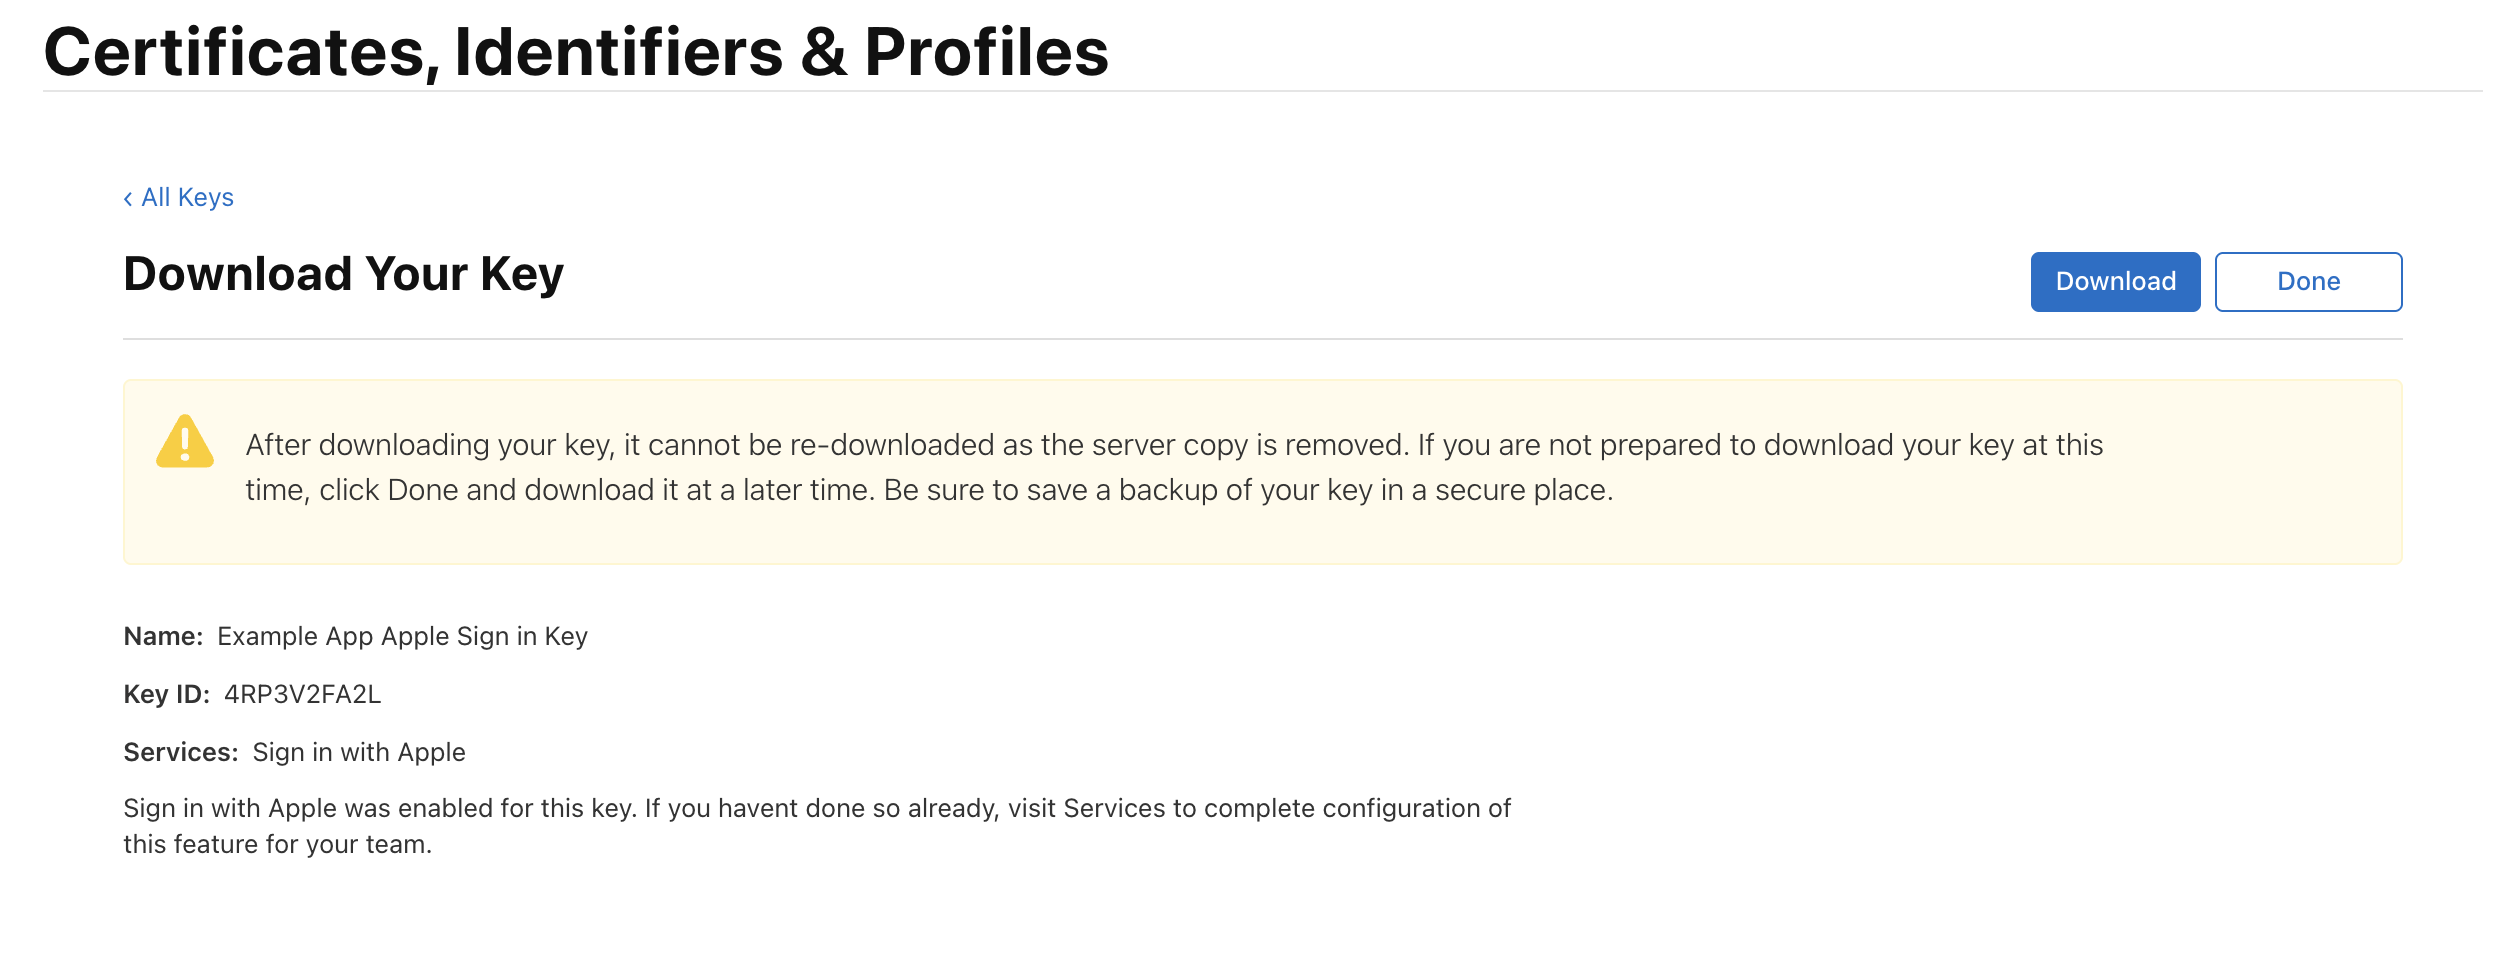
-
Find your Team ID in your Apple Developer Account under Membership.
Each primary App ID can have a maximum of two private keys. If you reach the limit, revoke an existing key before creating a new one. See Create a Sign in with Apple private key for details.
Store your credentials
Your server's config/passwords.yaml already has development:, staging:, and production: sections from the project template. Add the Apple credentials to the development: section:
development:
  # ... existing keys (database, redis, serviceSecret, etc.) ...
  appleServiceIdentifier: 'com.example.service'
  appleBundleIdentifier: 'com.example.app'
  appleRedirectUri: 'https://example.com/auth/callback'
  appleTeamId: 'ABC123DEF4'
  appleKeyId: 'XYZ789ABC0'
  appleKey: |
    -----BEGIN PRIVATE KEY-----
    MIGTAgEAMBMGByqGSM49AgEGCCqGSM49AwEHBHkwdwIBAQQg...
    -----END PRIVATE KEY-----
  # Web only (server callback route).
  appleWebRedirectUri: 'https://example.com/auth/apple-complete'
  # Android only.
  appleAndroidPackageIdentifier: 'com.example.app'
Paste the raw .p8 file contents as-is. Do not pre-generate a JWT. Serverpod handles that internally. If sign-in fails, see the troubleshooting guide.
When you are ready to ship, see Going to production for the production credential setup.
Server-side configuration
Add the Apple identity provider
If your project doesn't have the auth module installed yet (for example, you're upgrading an older project), follow the auth module Setup guide first before continuing.
In your server's server.dart, import the Apple provider and add it to the existing identityProviderBuilders list on pod.initializeAuthServices():
import 'package:serverpod_auth_idp_server/providers/apple.dart';

// ...

pod.initializeAuthServices(
  tokenManagerBuilders: [
    JwtConfigFromPasswords(),
  ],
  identityProviderBuilders: [
    // ... any existing providers (e.g., EmailIdpConfigFromPasswords) ...
    AppleIdpConfigFromPasswords(),
  ],
);
The AppleIdpConfigFromPasswords() constructor reads the eight apple* keys from config/passwords.yaml (or the corresponding SERVERPOD_PASSWORD_ environment variables), so you do not have to wire up each credential manually.
If you need more control over how the credentials are loaded, you can use AppleIdpConfig(...) with manual pod.getPassword() calls instead. See the customizations page for details.
Configure web routes
Sign in with Apple requires web routes for handling callbacks and revocation notifications. Add this call before pod.start():
pod.configureAppleIdpRoutes(
  revokedNotificationRoutePath: '/hooks/apple-notification',
  webAuthenticationCallbackRoutePath: '/auth/callback',
);
The webAuthenticationCallbackRoutePath must match the Return URL you registered on your Service ID. The revokedNotificationRoutePath is called by Apple when a user revokes access from their Apple ID settings.
Create the endpoint
Create a new endpoint file in your server project (e.g., my_project_server/lib/src/auth/apple_idp_endpoint.dart). Extending the base class registers the sign-in methods with your server so the Flutter client can call them:
import 'package:serverpod_auth_idp_server/providers/apple.dart';

class AppleIdpEndpoint extends AppleIdpBaseEndpoint {}
Start the server
Start the server from your server project directory (e.g., my_project_server/):
serverpod start
Then create and apply the migration for the provider's tables: in the serverpod start terminal, press M to create the migration, then A to apply it.
Skipping the migration will cause the server to crash at runtime when the Apple provider tries to read or write user data. More detailed instructions can be found in the general identity providers setup section.
Client-side configuration
The Flutter app created with serverpod create already has serverpod_auth_idp_flutter in pubspec.yaml. If your app doesn't, add it:
flutter pub add serverpod_auth_idp_flutter
It uses sign_in_with_apple under the hood for platform-specific sign-in flows.
Sign in with Apple may not work correctly on all Simulator versions. If you run into issues during development, test on a physical device to confirm whether the problem is Simulator-specific.
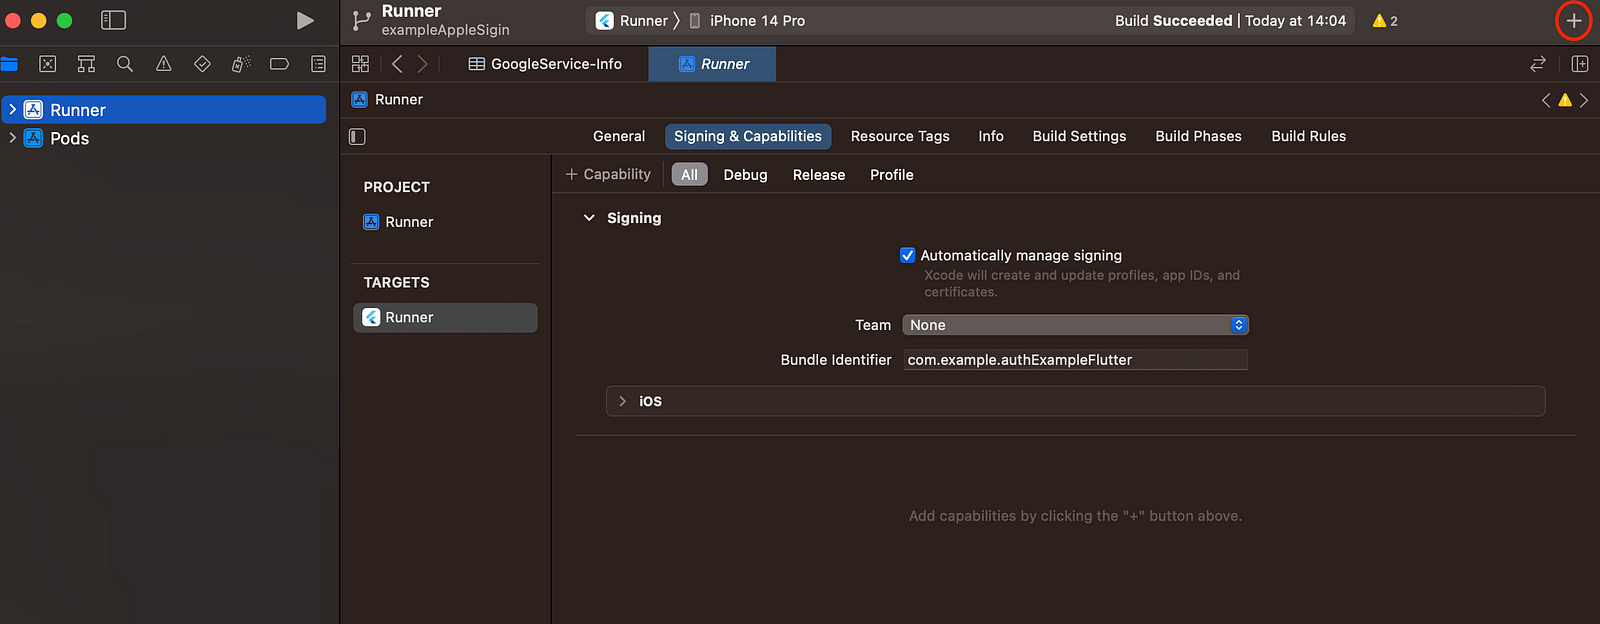
iOS and macOS
Enable the Sign in with Apple capability in your Xcode project:
- Open your project in Xcode.
- Select your target.
- Go to Signing & Capabilities.
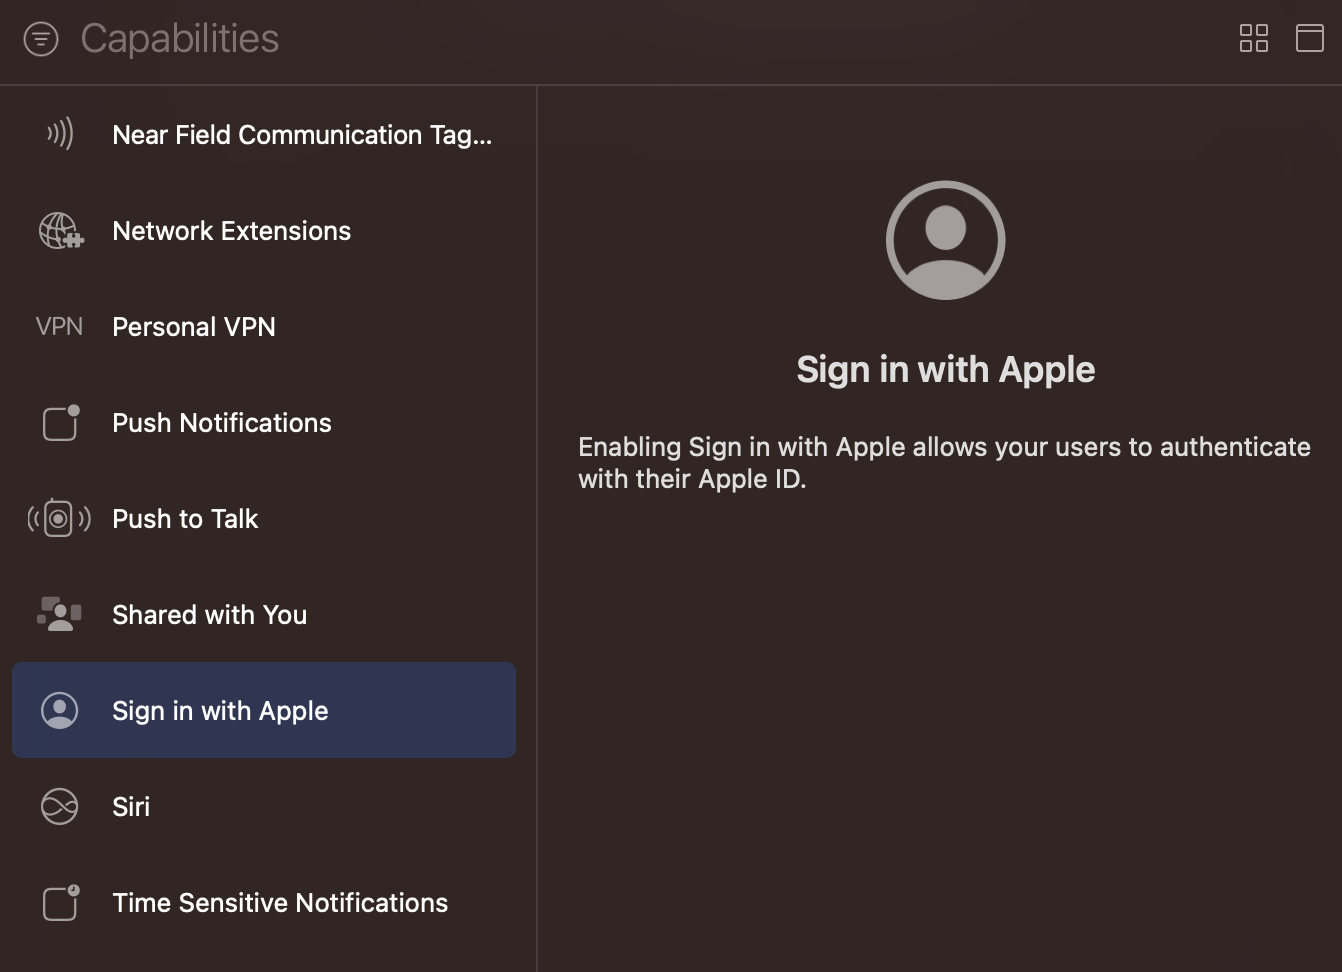
- Click + Capability.
- Add Sign in with Apple.
Android
Sign in with Apple on Android works through a web-based OAuth flow. When the user completes authentication, Apple redirects to your server's callback route, which then redirects back to your app using an Android intent URI with the signinwithapple scheme.
The redirect URI and appleAndroidPackageIdentifier were already configured in the Store your credentials and Service ID steps. The only remaining step is to register the signinwithapple URI scheme in your AndroidManifest.xml:
<activity
  android:name="com.linusu.flutter_web_auth_2.CallbackActivity"
  android:exported="true">
  <intent-filter android:label="flutter_web_auth_2">
    <action android:name="android.intent.action.VIEW" />
    <category android:name="android.intent.category.DEFAULT" />
    <category android:name="android.intent.category.BROWSABLE" />
    <data android:scheme="signinwithapple" />
  </intent-filter>
</activity>
This intent filter is required. Without it, the OAuth callback never returns to your app and sign-in silently hangs.
Web
Sign in with Apple on Web requires the Apple JS SDK. Add the following script to your Flutter app's web/index.html inside the <head> tag:
<script type="text/javascript" src="https://appleid.cdn-apple.com/appleauth/static/jsapi/appleid/1/en_US/appleid.auth.js" crossorigin="anonymous"></script>
The redirect URI and appleWebRedirectUri were already configured in the Store your credentials and Service ID steps.
Present the authentication UI
Initialize the Sign in with Apple service
In your Flutter app's main.dart file (e.g., my_project_flutter/lib/main.dart), the template already sets up the Client and calls client.auth.initialize(). Add client.auth.initializeAppleSignIn() right after it:
client.auth.initialize();
client.auth.initializeAppleSignIn();
On Web and Android, the sign-in service needs your Service ID and redirect URI. Pass them as build-time environment variables using --dart-define:
flutter run \
  -d "<device>" \
  --dart-define="APPLE_SERVICE_IDENTIFIER=com.example.service" \
  --dart-define="APPLE_REDIRECT_URI=https://example.com/auth/callback"
Use the same values you configured in the Service ID and Store your credentials steps.
You can also pass the values directly as parameters instead. See the customizations page for details.
Add the sign-in widget
If you have configured the SignInWidget as described in the setup section, the Apple identity provider will be automatically detected and displayed in the sign-in widget.
You can also use the AppleSignInWidget directly in your widget tree to include the Apple authentication flow in your own custom UI:
import 'package:serverpod_auth_idp_flutter/serverpod_auth_idp_flutter.dart';

AppleSignInWidget(
  client: client,
  onAuthenticated: () {
    // Do something when the user is authenticated.
    //
    // NOTE: You should not navigate to the home screen here, otherwise
    // the user will have to sign in again every time they open the app.
  },
  onError: (error) {
    // Handle errors
    ScaffoldMessenger.of(context).showSnackBar(
      SnackBar(content: Text('Error: $error')),
    );
  },
)
This renders a Sign in with Apple button like this:

The widget automatically handles:
- Sign in with Apple flow for iOS, macOS, Android, and Web.
- Token management.
- Underlying
sign_in_with_applepackage error handling.
For details on how to customize the Sign in with Apple UI in your Flutter app, see the customizing the UI section.
Apple sends the user's email and name only on the first sign-in. If your server does not persist them during that first authentication, they cannot be retrieved later.
Going to production
Update the Apple Developer Portal
Add your production domain and callback URL to the Service ID. The development tunnel URL and the production URL can stay registered at the same time.
- In Certificates, Identifiers & Profiles, open your Service ID.
- Under Sign in with Apple, click Configure.
- Add your production domain to Domains and Subdomains (e.g.
example.com). - Add your production callback to Return URLs (e.g.
https://example.com/auth/callback). - Click Next, Done, then Save.
Set production credentials
Production runs out of the production: section of passwords.yaml, which is separate from the development: section you populated during setup. Adding production credentials does not replace your development ones, both stay in place and Serverpod picks the right set based on the run mode.
Most credentials, like the Team ID, Key ID, and .p8 private key, can be reused from development. The values that typically differ are the URLs (appleRedirectUri and appleWebRedirectUri), which should point at your production domain rather than your development tunnel. If you use a different App ID or Service ID for production, register them in the Apple Developer Portal first and use those identifiers below.
Pick the path that matches your deployment:
Self-hosted
Add the apple* keys to the production: section of passwords.yaml with production values, or set them as environment variables on the production server using the SERVERPOD_PASSWORD_ prefix (e.g. SERVERPOD_PASSWORD_appleServiceIdentifier, SERVERPOD_PASSWORD_appleKey).
Serverpod Cloud
Use scloud password set for each credential. The appleKey value spans multiple lines, so pass it via --from-file:
scloud password set appleServiceIdentifier "com.example.service"
scloud password set appleBundleIdentifier "com.example.app"
scloud password set appleRedirectUri "https://example.com/auth/callback"
scloud password set appleTeamId "ABC123DEF4"
scloud password set appleKeyId "XYZ789ABC0"
scloud password set appleKey --from-file ./AuthKey_XYZ789ABC0.p8
scloud password set appleWebRedirectUri "https://example.com/auth/apple-complete"
scloud password set appleAndroidPackageIdentifier "com.example.app"
Run these from your linked server project directory, or pass --project <project-id> on each call. See the Serverpod Cloud passwords guide for project linking and other options.
Update client builds
For Web and Android release builds, pass the production Service ID and redirect URI via --dart-define:
flutter build web \
  --dart-define="APPLE_SERVICE_IDENTIFIER=com.example.service" \
  --dart-define="APPLE_REDIRECT_URI=https://example.com/auth/callback"
If you run into issues, see the troubleshooting guide.