Email sign-in
This page documents the legacy serverpod_auth module. To move an existing app to the current authentication framework, see Migrate from legacy auth.
To properly configure Sign in with Email, you must connect your Serverpod to an external service that can send the emails. One convenient option is the mailer package, which can send emails through any SMTP service. Most email providers, such as Sendgrid or Mandrill, support SMTP.
A comprehensive tutorial covering email/password sign-in complete with sending the validation code via email is available here.
You need to install the auth module before you continue, see Setup.
Server-side configuration
In your main server.dart file, import the serverpod_auth_server module, and set up the authentication configuration:
import 'package:serverpod_auth_server/serverpod_auth_server.dart' as auth;

auth.AuthConfig.set(auth.AuthConfig(
  sendValidationEmail: (session, email, validationCode) async {
    // Send the validation email to the user.
    // Return `true` if the email was successfully sent, otherwise `false`.
    return true;
  },
  sendPasswordResetEmail: (session, userInfo, validationCode) async {
    // Send the password reset email to the user.
    // Return `true` if the email was successfully sent, otherwise `false`.
    return true;
  },
));

// Start the Serverpod server.
await pod.start();
For debugging purposes, you can print the validation code to the console. The chat module example does just this. You can view that code here.
Client-side configuration
Add the dependencies to your pubspec.yaml in your client project.
dependencies:
  ...
  serverpod_auth_client: 4.0.0
Add the dependencies to your pubspec.yaml in your Flutter project.
dependencies:
  ...
  serverpod_auth_email_flutter: 4.0.0
  serverpod_auth_shared_flutter: 4.0.0
Prebuilt sign in button
The package includes both methods for creating a custom email sign-in form and a pre-made SignInWithEmailButton widget. The widget is easy to use, all you have to do is supply the auth client. It handles everything from user signups, login, and password resets for you.
 SignInWithEmailButton(
  caller: client.modules.auth,
  onSignedIn: () {
    // Optional callback when user successfully signs in
  },
),

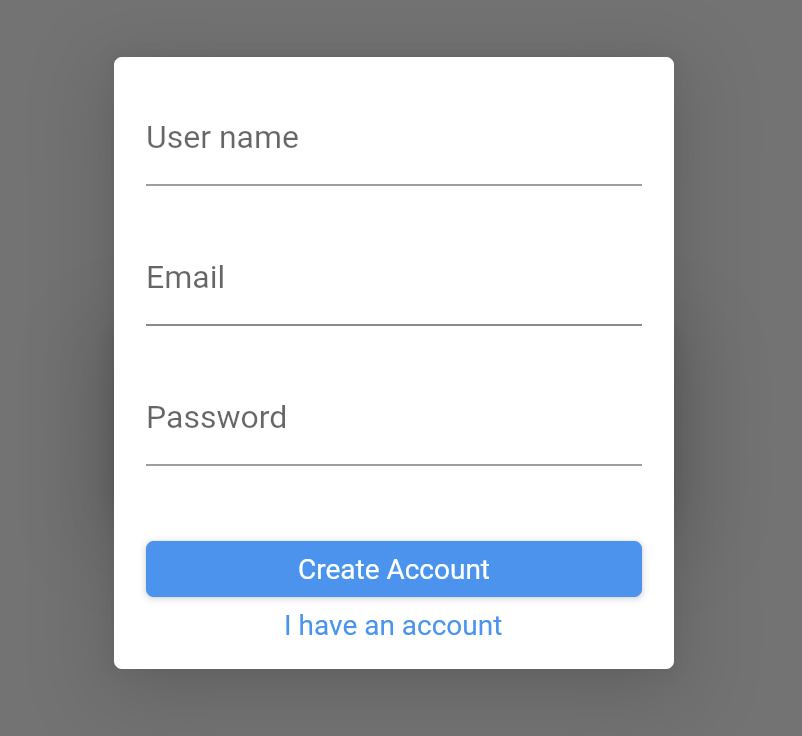
Modal example
The triggered modal will look like this:
Custom UI with EmailAuthController
The serverpod_auth_email_flutter module provides the EmailAuthController class, which encapsulates the functionality for email/password authentication. You can use this class and create a custom UI for user registration, login, and password management.
import 'package:serverpod_auth_email_flutter/serverpod_auth_email_flutter.dart';

final authController = EmailAuthController(client.modules.auth);
To let a user signup first call the createAccountRequest method which will trigger the backend to send an email to the user with the validation code.
await authController.createAccountRequest(userName, email, password);
Then let the user type in the code and send it to the backend with the validateAccount method. This method creates the user and returns the new UserInfo if the code is valid. Call signIn afterwards to sign the user in.
await authController.validateAccount(email, verificationCode);
To let users log in if they already have an account you can use the signIn method.
await authController.signIn(email, password);
Finally to let a user reset their password you first initiate a password reset with the initiatePasswordReset this will trigger the backend to send a verification email to the user.
await authController.initiatePasswordReset(email);
Let the user type in the verification code along with the new password and send it to the backend with the resetPassword method.
await authController.resetPassword(email, verificationCode, password);
After the password has been reset you have to call the signIn method to log in. This can be achieved by either letting the user type in the details again or chaining the resetPassword and signIn methods for a seamless UX.
Password storage security
Serverpod provides some additional configurable options to provide extra layers of security for stored password hashes.
By default, the minimum password length is set to 8 characters. If you wish to modify this requirement, you can utilize the properties within AuthConfig.
Peppering
For an additional layer of security, it is possible to configure a password hash pepper. A pepper is a server-side secret that is added, along with a unique salt, to a password before it is hashed and stored. The pepper makes it harder for an attacker to crack password hashes if they have only gained access to the database.
The recommended pepper length is 32 bytes.
To configure a pepper, set the emailPasswordPepper property in the config/passwords.yaml file.
development:
  emailPasswordPepper: 'your-pepper'
It is essential to keep the pepper secret and never expose it to the client.
If the pepper is changed, all passwords in the database will need to be re-hashed with the new pepper.
Secure random
Serverpod uses the dart:math library to generate random salts for password hashing. By default, the server throws an exception if no secure random number generator is available (the allowUnsecureRandom property in the AuthConfig defaults to false).
To fall back to a cryptographically unsecure random number instead, set the allowUnsecureRandom property to true.
auth.AuthConfig.set(auth.AuthConfig(
  allowUnsecureRandom: true,
));
Custom password hash generator
It is possible to override the default password hash generator. The AuthConfig class allows you to provide a custom hash generator using the field passwordHashGenerator and a custom hash validator through the field passwordHashValidator. The validator receives named parameters and must return a PasswordValidationResult, either PasswordValidationSuccess or PasswordValidationFailed.
AuthConfig(
  passwordHashValidator: ({
    required password,
    required email,
    required hash,
  }) async {
    // Custom hash validation. Return PasswordValidationSuccess() if the
    // password matches the hash.
    return const PasswordValidationSuccess();
  },
  passwordHashGenerator: (password) async {
    // Custom hash generation. Return the generated hash.
    return myHashFunction(password);
  },
)
It could be useful if you already have stored passwords that should be preserved or migrated.
Using a custom hash generator will permanently disrupt compatibility with the default hash generator.