Authentication
Serverpod comes with built-in user management and authentication. You can either build your custom authentication method or use the serverpod_auth module. The module makes it easy to authenticate with email or social sign-ins.
The basics
The Session object provides information about the current user. A unique userId identifies a user. You should use this id whenever you a referring to a user. Access the id of a signed-in user through the auth field of the Session object.
Future<void> myMethod(Session session) async {
  var userId = await session.auth.authenticatedUserId;
  var isSignedIn = userId != null;
  ...
}
It's most common to use the auth module for handling sign ins, but you can also build your own. If you are building custom authentication methods, use the session.auth.signInUser() method to sign in a user and session.auth.signOutUser() to sign someone out.
Restricting access to endpoints
It is common to want to restrict access to an endpoint to users that have signed in. You can do this by overriding the requireLogin property of the Endpoint class.
class MyEndpoint extends Endpoint {
bool get requireLogin => true;
...
}
Serverpod also supports scopes for restricting access. One or more scopes can be associated with a user. For instance, this can be used to give admin access to a specific user. To restrict access for an endpoint, override the requiredScopes property.
class MyEndpoint extends Endpoint {
bool get requireLogin => true;
Set<Scope> get requiredScopes => {Scope.admin};
...
}
The serverpod_auth_server package provides convenient methods for handling basic user information and scopes.
To update a user's scopes, use the Users class's updateUserScopes method.
await Users.updateUserScopes(session, userId, {Scope.admin});
Installing the auth module
Serverpod's auth module makes it easy to authenticate users through email or 3rd parties. Currently supported is Signing in with email, Google, Apple, and Firebase. Future versions of the authentication module will include more options. Using this module requires some setup with Google and Apple to work.
The authentication module also handles basic user information, such as user names and profile pictures.

Please refer to the previous section, Modules, for instructions on how to add a module to your project.
App setup
First, add dependencies to your app's pubspec.yaml file for the methods of signing in that you want to support. Make sure to use the same version numbers as for Serverpod itself.
dependencies:
  flutter:
    sdk: flutter
  serverpod_flutter: ^1.x.x
  auth_example_client:
    path: ../auth_example_client

  serverpod_auth_shared_flutter: ^1.x.x
  serverpod_auth_email_flutter: ^1.x.x
  serverpod_auth_google_flutter: ^1.x.x
Next, you need to set up a SessionManager, which keeps track of the user's state. It will also handle the authentication keys passed to the client from the server, upload user profile images, etc.
void main() async {
  // Need to call this as we are using Flutter bindings before runApp is called.
  WidgetsFlutterBinding.ensureInitialized();

  // Sets up a singleton client object that can be used to talk to the server
  // from anywhere in our app. The client is generated from your server code.
  // The client is set up to connect to a Serverpod running on a local server on
  // the default port. You will need to modify this to connect to staging or
  // production servers.
  client = Client(
    'http://localhost:8080/',
    authenticationKeyManager: FlutterAuthenticationKeyManager(),
  );

  // The session manager keeps track of the signed-in state of the user. You
  // can query it to see if the user is currently signed in and get information
  // about the user.
  sessionManager = SessionManager(
    caller: client.modules.auth,
  );
  await sessionManager.initialize();

  runApp(MyApp());
}
The SessionManager has useful methods for viewing and monitoring the user's current state:
- The
signedInUserwill return aUserInfoif the user is currently signed in (ornullif the user isn't signed in). - Use the
addListenermethod to get notified of changes to the user's signed in state. - Sign out a user by calling the
signOutmethod.
Setting up Sign in with Email
To properly configure Sign in with Email, you must connect your Serverpod to an external service that can send the emails. One convenient option is the mailer package, which can send emails through any SMTP service. Most email providers, such as Sendgrid or Mandrill, support SMTP.
In your main server.dart file, you can configure the auth module. First, make sure to include the module:
import 'package:serverpod_auth_server/module.dart' as auth;
Then, add the configuration before you start your Serverpod:
auth.AuthConfig.set(auth.AuthConfig(
  sendValidationEmail: (session, email, validationCode) async {
    // Send your validation email here.
  },
  sendPasswordResetEmail: (session, userInfo, validationCode) async {
    // Send a password reset email here.
  },
));

// Start the server.
await pod.start();
For debugging purposes, you can print the validation code to the console. The chat module example does just this. You can view that code here.
In your app, you will need to add the serverpod_auth_email_flutter package to your pubspec.yaml. The package includes both methods for creating a custom email sign-in form and a pre-made SignInWithEmailButton widget. If you are building custom forms, it is helpful to read the documentation provided in the module and review the code in the SignInWithEmailDialog.
Setting up Sign in with Google
To set up Sign in with Google, you will need a Google account for your organization and set up a new project. For the project, you need to set up Credentials and Oauth consent screen. You will also need to add the serverpod_auth_google_flutter package to your app and do some additional setup depending on each platform.
Configure Google Cloud console and your server
In the Google Cloud console, you need to set up a few things:
- Activate the People API for your project. You find it in APIs & Services > Enabled APIs & services.
- Set up the OAuth consent screen. It's in APIs & Services > OAuth consent screen.
- You will need a domain for your project, which you add under
Authorized domains. - Add
.../auth/userinfo.emailand.../auth/userinfo.profileto yourScopes.
- You will need a domain for your project, which you add under
- Add OAuth 2.0 credentials for your web application. Do this under APIs & Services > Credentials.
- Create a Web application OAuth Client ID. This is required even if you only want to provide sign-in with iOS or Android, as the server uses it to access Google's APIs.
- For _Authorized JavaScript origins`, enter your domain name.
- For Authorized redirect URIs, enter your domain name. You may also want to add your development server here, e.g.,
http://localhost:8080. - Download the JSON file for your web application OAuth client. This file contains both the client id and the client secret. Rename the file to
google_client_secret.jsonand place it in your server'sconfigdirectory.
- Add OAuth 2.0 credentials for iOS and Android.
- Create an OAuth Client ID for iOS or Android.
- Download the associated Plist-file.
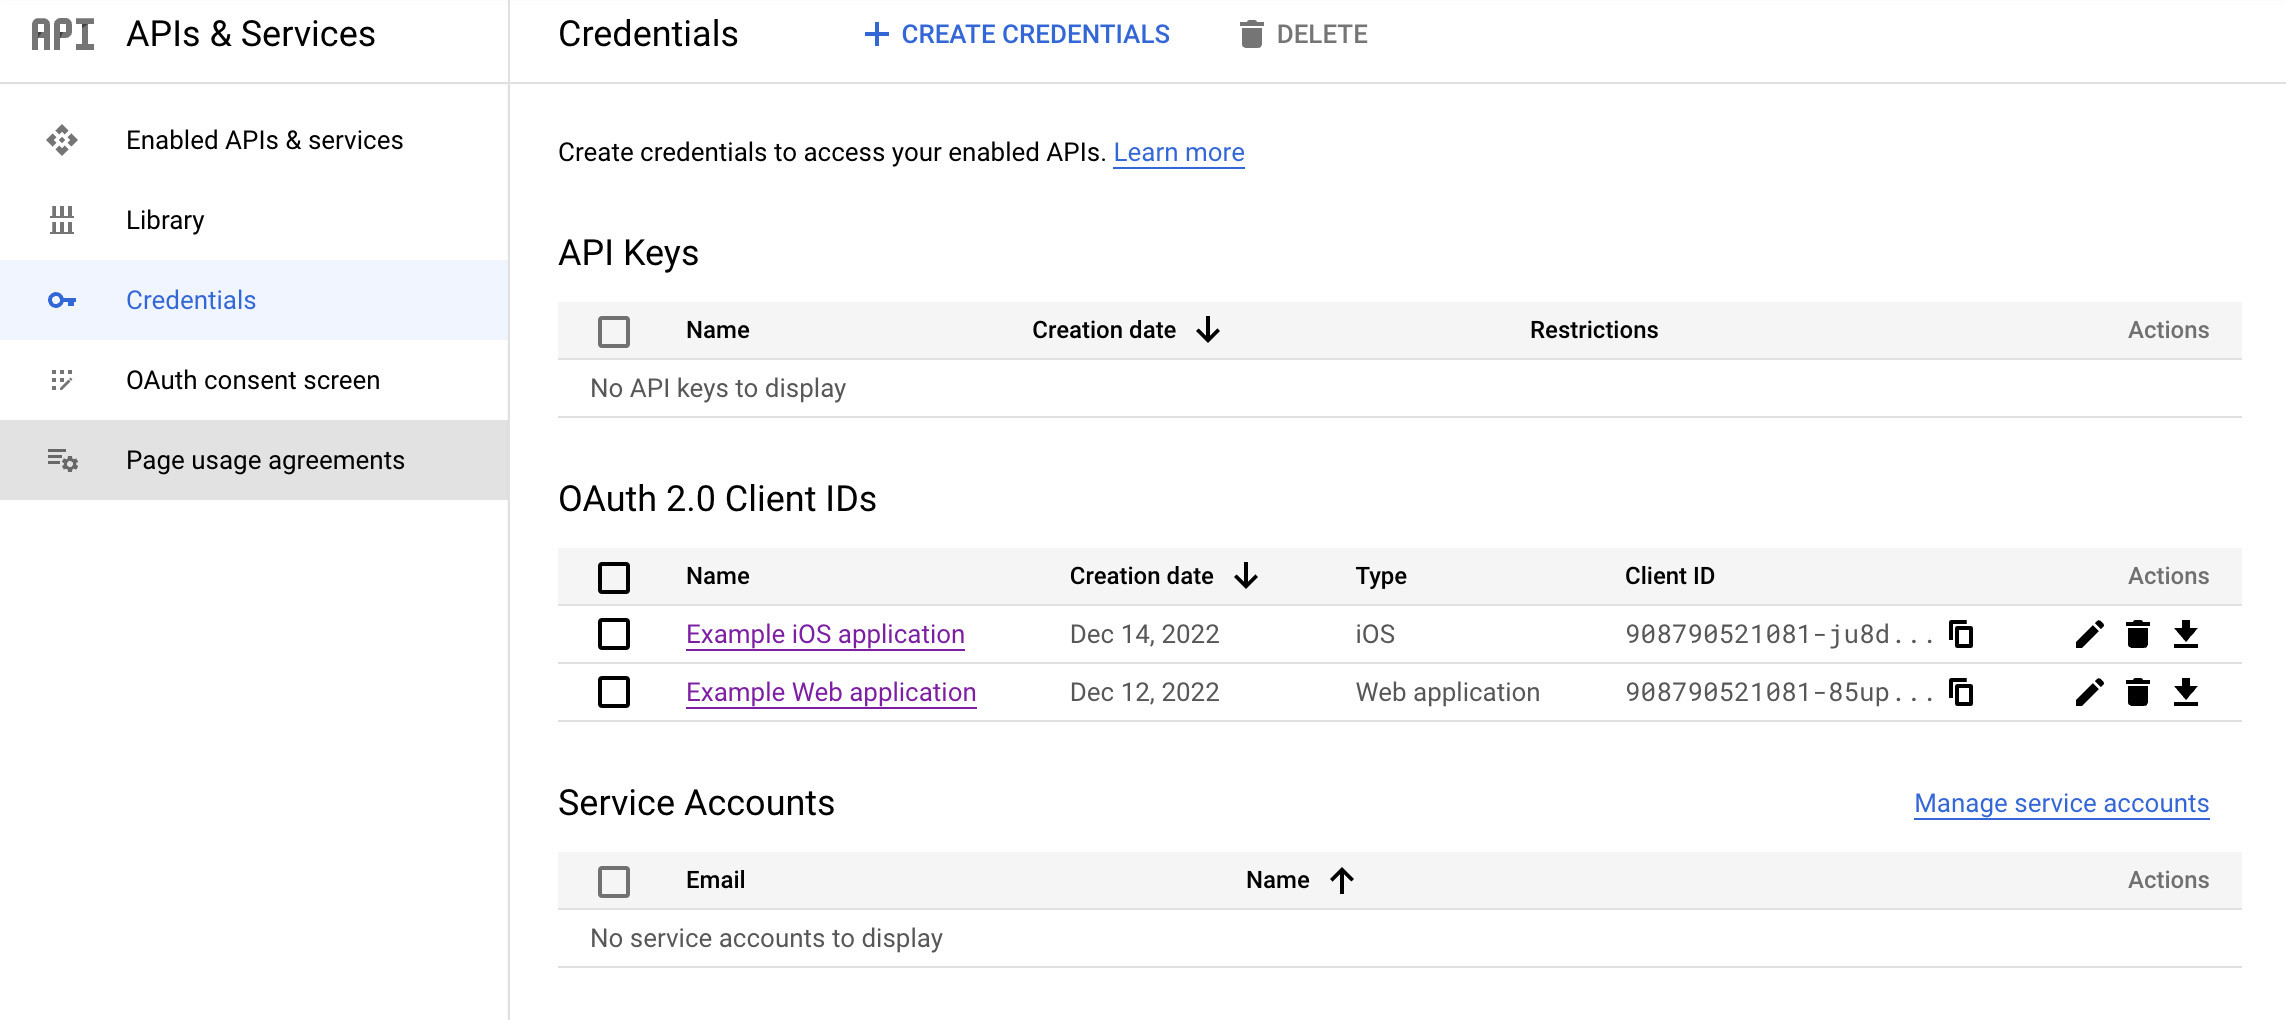 Credentials configured for the server and an iOS app.
The google_client_secret.json contains a private key and should not be version controlled.
Configure your app
You need to take platform-dependent steps to configure Sign in with Google in your app.
- Add the
serverpod_auth_google_flutterpackage to your app. - For iOS, download the plist from the Credentials page in Google Cloud console. Rename the file to
GoogleService-Info.plistand add it to your Xcode project. Open the plist file. If there is no entry forSERVER_CLIENT_ID, you will need to add that to the file. TheSERVER_CLIENT_IDis the Client ID of your web app, and you get it from the Credentials page. - For iOS, add a URL type to your Info. You find it in Xcode under Targets > Runner > Info. Set the URL Schemes to the
REVERSE_CLIENT_IDas specified in the plist, and the Role to Editor. - For Android, there are similar steps you need to take. The google_sign_in package provides information about the setup.
- In your code, you sign in with Google by calling the
signInWithGooglemethod or by adding theSignInWithGoogleButtonwidget. For the process to work, you must pass in theredirectUriparameter. This Uri should be the same as you configured in the OAuth consent screen. For debugging purposes, useUri.parse('http://localhost:8080');
Rather than using the GoogleService-Info.plist file for iOS, you can pass the clientId and the serverClientId to the signInWithGoogle method or the SignInWithGoogleButton widget. The serverClientId is the client ID of the web application.
Calling Google APIs
The default setup allows access to basic user information, such as email, profile image, and name. You may require additional access scopes, such as accessing a user's calendar, contacts, or files. To do this, you will need to:
- Add the required scopes to the OAuth consent screen.
- Request access to the scopes when signing in. Do this by setting the
scopesparameter of thesignInWithGooglemethod or theSignInWithGoogleButtonwidget.
On the server side, you can now access these Google APIs. If a user has signed in with Google, use the authClientForUser method from the serverpod_auth_server package to request an AutoRefreshingAuthClient. The AutoRefreshingAuthClient can be used to access Google's APIs on the user's behalf.
For instance, to access the Youtube APIs, add the scope to your SignInWithGoogleButton in your app:
SignInWithGoogleButton(
  scopes: [YouTubeApi.youtubeReadonlyScope],
  // other required parameters
)
On the server, access the Youtube API by first creating a client, then calling the API.
var googleClient = await authClientForUser(session, userId);

if (googleClient != null) {
  var youtubeApi = YouTubeApi(googleClient);

  var favorites = await youTubeApi.playlistItems.list(
    ['snippet'],
    playlistId: 'LL', // Liked List
  );

}
else {
  // The user hasn't signed in with Google.
}
Adding additional scopes may require approval by Google. On the OAuth consent screen, you can see which of your scopes are considered sensitive.
Setting up Sign in with Apple
You will need an Apple developer account to configure Sign in with Apple. Follow the instructions in sign_in_with_apple.
Note that Sign in with Apple may not work on some versions of the Simulator (iOS 13.5 works). This issue doesn't affect real devices.
Setting up Sign in with Firebase
Serverpod uses FlutterFire UI to handle authentication through Firebase. It allows you to add social sign-in types that Serverpod doesn't directly support.
To add authentication with Firebase, you must first install and initialize the Firebase CLI tools and Flutter fire. Follow the instructions here for your Flutter project. In the Firebase console, configure the different social sign-ins you plan to use. Then pass your provider configurations to either the signInWithFirebase method or the SignInWithFirebaseButton of the serverpod_auth_firebase_flutter package.
Server-side, you need to create a set of authentication keys in the Firebase console, download the JSON file, rename it to firebase_service_account_key.json and place it in the config folder.
Serverpod automatically merges accounts that are using the same email addresses, so make sure only to allow sign-ins where the email has been verified.
Working with users
It's a common task to read or update user information on your server. You can always retrieve the id of a signed-in user through the session object.
var userId = await session.auth.authenticatedUserId;
If you sign in users through the auth module, you will be able to retrieve more information through the static methods of the Users class.
var userInfo = await Users.findUserByUserId(session, userId!);
The UserInfo is automatically populated when the user signs in. Different data may be available depending on which method was used for authentication.
The Users class contains many other convenient methods for working with users. You can find the full documentation here.
Displaying or editing user images
The module has built-in methods for handling a user's basic settings, including uploading new profile pictures.

To display a user's profile picture, use the CircularUserImage widget and pass a UserInfo retrieved from the SessionManager.
To edit a user profile image, use the UserImageButton widget. It will automatically fetch the signed-in user's profile picture and communicate with the server.
Supported authentication methods
Currently, sign-in with Google, Apple, Firebase, and email is natively supported. If you write another authentication module, please consider contributing your code.