Setup
Serverpod comes with built-in user management and authentication. It is possible to build a custom authentication implementation, but the recommended way to authenticate users is to use the serverpod_auth_idp module. The module makes it easy to authenticate with email, social sign-ins and more.
The list of identity providers is continuously growing and new providers are added as they are developed. If you want to contribute a new provider, please consider contributing your code. See the identity providers configuration section for details on all available providers.
Installing the auth module
Serverpod's auth module makes it easy to authenticate users through email or 3rd parties. The authentication module also handles basic user information, such as user names and profile pictures. Make sure to use the same version numbers as for Serverpod itself for all dependencies.
Server setup
Add the auth modules as dependencies to the server project's pubspec.yaml.
dependencies:
  ...
  serverpod_auth_idp_server: 3.x.x
The serverpod_auth_idp_server package contains all components required to configure authentication services.
Configure Authentication Services
In your main server.dart file, configure the authentication system using the pod.initializeAuthServices() extension method.
import 'package:serverpod/serverpod.dart';
import 'package:serverpod_auth_idp_server/core.dart';

import 'src/generated/protocol.dart';
import 'src/generated/endpoints.dart';

void run(List<String> args) async {
  final pod = Serverpod(
    args,
    Protocol(),
    Endpoints(),
  );

  // Set up authentication services
  // The `pod.getPassword()` will get the value from `config/passwords.yaml`.
  pod.initializeAuthServices(
    tokenManagerBuilders: [
      JwtConfig(
        // Pepper used to hash the refresh token secret.
        refreshTokenHashPepper: pod.getPassword('jwtRefreshTokenHashPepper')!,
        // Algorithm used to sign the tokens (`hmacSha512` or `ecdsaSha512`).
        algorithm: JwtAlgorithm.hmacSha512(
          // Private key to sign the tokens. Must be a valid HMAC SHA-512 key.
          SecretKey(pod.getPassword('jwtHmacSha512PrivateKey')!),
        )
      ),
    ],
  );

  await pod.start();
}
Then, extend the abstract endpoint for refreshing JWT tokens to expose it on the server:
import 'package:serverpod_auth_idp_server/core.dart' as core;

class RefreshJwtTokensEndpoint extends core.RefreshJwtTokensEndpoint {}
Token Manager Configuration
The authentication system uses token managers to handle authentication tokens. You need to configure at least one token manager to be used as the primary token manager. Additional token managers can be configured to be used for validation and management operations.
Serverpod provides two built-in token manager builders:
JwtConfigto use JWT-based authentication. See JWT Token Manager for details.ServerSideSessionsConfigto use server-side sessions authentication. See Server-Side Sessions Token Manager for details.
For more details on how to configure token managers or create custom ones, see the dedicated Token Managers documentation.
Identity Providers Configuration
Identity providers handle authentication with different methods (Email, Google, Apple, etc.). Each provider has its own configuration:
- Email: Sign-up and sign-in with email and password. See Email Provider for details.
- Google: Sign-in with Google. See Google Provider for details.
- Apple: Sign-in with Apple. See Apple Provider for details.
- Passkey (experimental): Sign-in with Passkey. See Passkey Provider for details.
By default, endpoints for all providers are disabled. To enable a provider, it is necessary to:
-
Pass its config object to the
identityProviderBuildersparameter of thepod.initializeAuthServices()method.pod.initializeAuthServices(identityProviderBuilders: [EmailIdpConfig( /* configuration options */ ),],);tipSome identity providers might require configuration on external services, such as the Google client secret. Such configuration will be required by the provider config object.
-
Extend the identity provider abstract endpoint.
import 'package:serverpod_auth_idp_server/providers/email.dart';class EmailIdpEndpoint extends EmailIdpBaseEndpoint {} -
Run
serverpod generateto generate the client code and endpoint methods for the provider.$ serverpod generate -
Create a migration to initialize the database for the provider.
# Create the migration$ serverpod create-migration# Start the database container$ docker compose up --build --detach# Apply the migration$ dart run bin/main.dart --role maintenance --apply-migrationsinfoIf this is the first time creating migrations after adding the module, besides the provider tables, all auth module tables will also be created. More detailed migration instructions can be found in the migration guide.
Storing Secrets
Secrets like peppers and private keys should be stored securely. The example above uses pod.getPassword() which reads from your config/passwords.yaml file or environment variables in the format SERVERPOD_PASSWORD_<key>='value'.
Add secrets to config/passwords.yaml:
development:
  serverSideSessionKeyHashPepper: 'your-session-pepper-here'
  jwtRefreshTokenHashPepper: 'your-refresh-token-pepper-here'
  jwtHmacSha512PrivateKey: 'your-private-key-here'
  emailSecretHashPepper: 'your-email-pepper-here'
  googleClientSecret: '{"type":"service_account",...}'
  # ... other secrets
Or use environment variables in the expected format:
export SERVERPOD_PASSWORD_serverSideSessionKeyHashPepper='your-session-pepper-here'
export SERVERPOD_PASSWORD_jwtRefreshTokenHashPepper='your-refresh-token-pepper-here'
export SERVERPOD_PASSWORD_jwtHmacSha512PrivateKey='your-private-key-here'
export SERVERPOD_PASSWORD_emailSecretHashPepper='your-email-pepper-here'
export SERVERPOD_PASSWORD_googleClientSecret='{"type":"service_account",...}'
# ... other secrets
When using the config/passwords.yaml file or environment variables, you can use a convenience version of token manager and identity provider builders that already load secrets using pod.getPassword() while still allowing you to pass additional configuration options.
final jwtConfig = JwtConfigFromPasswords();
final serverSideSessionsConfig = ServerSideSessionsConfigFromPasswords();
final emailIdpConfig = EmailIdpConfigFromPasswords();
final googleIdpConfig = GoogleIdpConfigFromPasswords();
final appleIdpConfig = AppleIdpConfigFromPasswords();
final passkeyIdpConfig = PasskeyIdpConfigFromPasswords();
Never commit config/passwords.yaml to version control. Be sure to add it to your .gitignore file. Prefer environment variables or secure secret management in production.
Client setup
Add the serverpod_auth_idp_client package to your client project's pubspec.yaml. Make sure to use the same version numbers as for Serverpod itself for all dependencies.
dependencies:
  ...
  serverpod_auth_idp_client: 3.x.x
App setup
First, add dependencies to your app's pubspec.yaml file for the methods of signing in that you want to support.
dependencies:
  flutter:
    sdk: flutter
  serverpod_auth_idp_flutter: 3.x.x
  serverpod_flutter: 3.x.x
  your_client:
    path: ../your_client
Next, you need to set up a FlutterAuthSessionManager, which keeps track of the user's authentication state. It handles authentication tokens, token storage and refresh, and user session management.
import 'package:flutter/material.dart';
import 'package:serverpod_flutter/serverpod_flutter.dart';
import 'package:serverpod_auth_idp_flutter/serverpod_auth_idp_flutter.dart';
import 'package:your_client/your_client.dart';

late Client client;

void main() async {
  WidgetsFlutterBinding.ensureInitialized();

  const serverUrl = 'http://localhost:8080/';

  // Create the client with the auth session manager
  client = Client(serverUrl)
    ..connectivityMonitor = FlutterConnectivityMonitor()
    ..authSessionManager = FlutterAuthSessionManager();

  // Initialize authentication (restores session from storage and validates)
  await client.auth.initialize();

  runApp(MyApp());
}
The FlutterAuthSessionManager provides useful properties and methods for managing authentication state.
In case you have an endpoint called AuthEndpoint - that will generate the auth getter on the client -, you can also get the FlutterAuthSessionManager from the client using the client.authSessionManager property. On the above example, you would replace the client.auth.initialize() call with client.authSessionManager.initialize().
Initialize authentication
The initialize() method restores any existing session from storage and validates it with the server. It should be called when your app starts:
await client.auth.initialize();
This is equivalent to calling restore() followed by validateAuthentication(). If the authentication is no longer valid, the user is automatically signed out.
See Client-side authentication for more details on how to interact with the authentication state from the client.
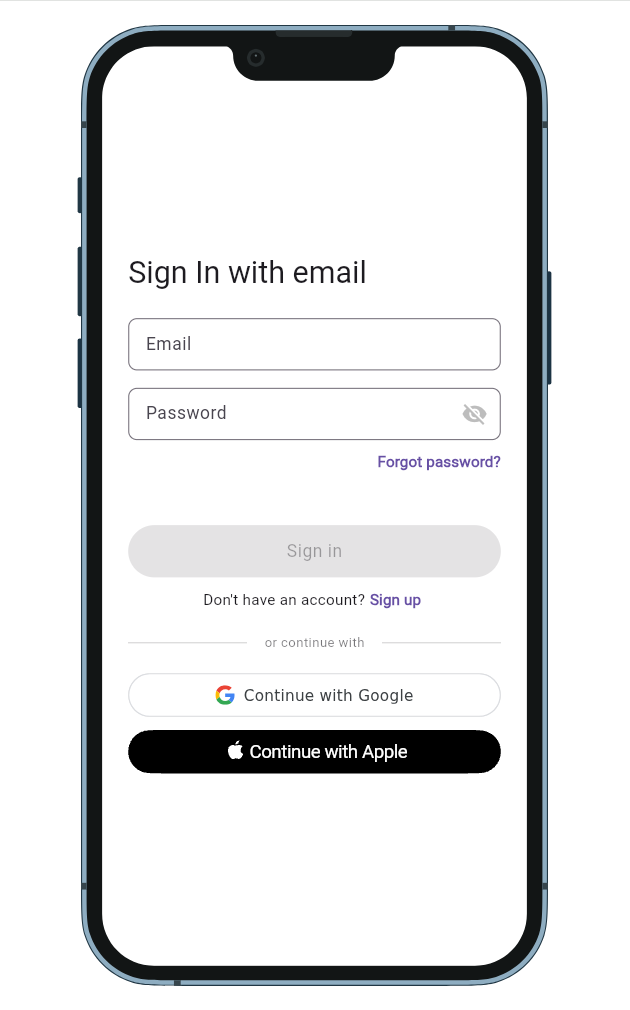
Present the authentication UI
The serverpod_auth_idp_flutter package provides a SignInWidget that automatically detects enabled authentication providers and displays the appropriate sign-in options.
import 'package:flutter/material.dart';
import 'package:serverpod_auth_idp_flutter/serverpod_auth_idp_flutter.dart';
import 'package:your_client/your_client.dart';
class SignInPage extends StatelessWidget {
final Client client;
const SignInPage({required this.client, super.key});
Widget build(BuildContext context) {
return Scaffold(
body: SignInWidget(
client: client,
onAuthenticated: () {
// Do something when the user is authenticated.
//
// NOTE: You should not navigate to the home screen here, otherwise
// the user will have to sign in again every time they open the app.
},
onError: (error) {
// Handle errors
ScaffoldMessenger.of(context).showSnackBar(
SnackBar(content: Text('Error: $error')),
);
},
),
);
}
}
This widget is a convenient way to use identity providers out-of-the-box, but you can also fully customize it or replace it with your own implementation. See the UI Components documentation for more details.
Updating the UI based on authentication state
Instead of navigating to the home screen using the onAuthenticated callback, you can listen to authentication state changes and update the UI accordingly. See the Client-side authentication section for more details.